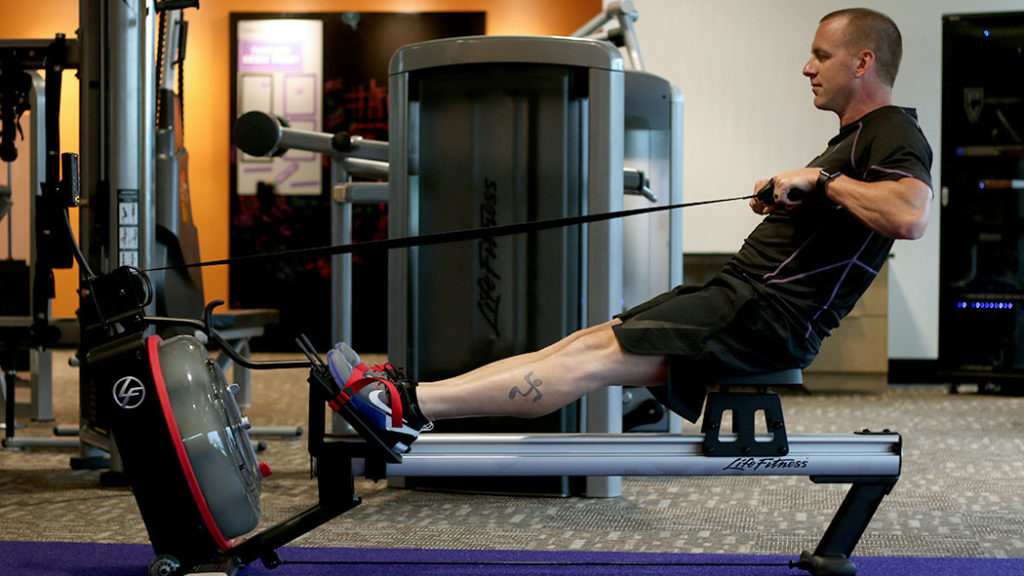
The rower can be one of the most effective machines in any gym. The low impact nature of rowing is gentle on the body, but still allows you to push yourself to a similar capacity as running or other cardio. However, unlike running or using an elliptical, both of which are pretty straightforward, rowing is a little more technical, and requires some practice to ensure you are using proper form. As we all know, exercising without proper form can lead to injury and a less effective workout, which is why it’s so important to know your form before you get started.
Before we jump into the rowing workout, we’ll first go through the steps that will make you an effective rower with solid form. By following the Catch, Drive, Finish, and Recovery technique, you can become a great rower in no time!
The Key Rowing Steps
The Catch
Once you’ve taken a seat with your feet situated, bend your knees so that your shins are vertical, hinge forward at the hips, and reach out to grab the “oar” (handle). Your arms should be fully extended with relaxed shoulders, and your torso leaning slightly forward. You want to have good posture, so be sure to keep your head neutral and spine straight and avoid rounding your shoulders. Your grip should be light on the oar, with your thumbs wrapped around the bottom loosely. To test this, you should be able to lift your thumbs off the handle and still perform the movement. Your wrists should be neutral—no flexing or extending. This starting position will set you up with the correct form for the drive phase.
The Drive
Your legs initiate and power the rowing movement. Begin by exploding through the legs by pushing yourself backward through your heels, as you continue to lean forward with straight arms. Once your legs are straight, hinge backwards at the hips to open your body into an angle of 120-130 degrees. Keep your back straight and engage your core as you lean back slightly. Finally, bend your elbows down to your sides and pull the handle in toward your midsection (toward the bottom of your lower ribs). Be sure to pull the handle toward you and maintain the best posture possible (long spine, relaxed shoulders, neutral head and neck) throughout the drive. This part of the sequence should be one fluid motion, it shouldn’t feel like two separate parts. While it can take some getting used to, we promise it will soon feel natural.
The Finish
Think of this phase as a very brief resting position, only for 1-2 seconds at the most. Your legs are fully extended with a slight bend, your torso, upper back, and shoulders are leaning back, and your arms have pulled the oar into your body.
The Recovery
Now we will reverse the actions of the drive. Lean your torso forward to release your arms back to straight, hinge at the hips to move your upper body forward over your thighs, then bend your knees to slide back into the catch position. The hardest part with the recovery is keeping your legs straight long enough to release the row and lean forward with your torso. The recovery should take twice as long as the drive (one second for the drive and two seconds for the recovery).
Common Rowing Mistakes
Pulling the handle back, instead of pushing with your legs. Remember step #2 above? It’s called the “drive” for a reason! The entire rowing motion is powered by muscles in your lower body, including: your quads, hamstrings, and glutes—not your biceps, shoulders, and back! Always remember to push through your heels, and then pull with your arms.
Having poor posture. One of the biggest mistakes we see a lot of people make is having poor upper body posture, especially as you get fatigued towards the end of your training session. Always remember to keep good form: chest upright, shoulders back, and core muscles tight. Poor posture can strain your neck, upper back, and even lower back and lead to injuries.
Raising your arms too high when rowing. Pull the oar directly to your chest—not to your chin! You should aim to pull the handle in a straight line from the machine to your chest. If you’re noticing that you’re finishing the pull up near your face, odds are that you’re “looping” the oar, which means you’re bending your knees before your arms are fully extended, causing you to make a scooping motion to avoid hitting your knees on the return. You don’t want that!
Rushing the recovery phase. Trust us, once you master the rowing motion and you begin to ramp-up the intensity, you will want to use the return to catch your breath. Instead of returning right to starting position, take a moment (2-3 seconds) to take a deep breath as you slide the seat back. This leads us to…
Focusing on speed over power. While it seems like you would go further the faster you row, that’s not necessarily true. Slower, more powerful strokes will propel you further distance over time, plus you’ll get a better workout, too.
And speaking of the workout, let’s get to it!
Rowing Distance Workout
Now that you’re familiar with proper rowing form, we can get into the workout. This workout will focus on distance, rather than time. If you have additional questions, make sure to stop in to your local AF to work with a coach that has a plan ready for you!
Warm Up
100 Meter Row
10 Jumping Jacks
200 Meter Row
20 Bodyweight Squats
500 Meter Row
Rowing Workout
500 Meter Row – Start at a challenging but doable pace.
1 Minute Rest
800 Meter Row – Work at a slightly faster pace than your first row.
2 Minute Rest
500 Meter Row – Try to beat your time from the first 500m row.
1 Minute Rest
1500 Meter Row – Longest row of the workout! Challenge yourself!
2 Minute Rest
500 Meter Row – Try to match your previous pace for your last row!
Cool Down
Recovery Row – Row for five minutes with a focus on form, rather than pace or distance.