Get to Your First Push-Up!
If there was an award for The Most Achievable-Yet-Intimidating Exercise, we would give first place to…drum roll please… the push-up! As Coaches, we are familiar with the phrase “I’m not strong enough to do a push-up” but WE OBJECT! Yes, push-ups are within reach and yes, your first one will feel rewarding AF.
The push-up is a top-shelf, grade-A exercise if you’re looking for a stronger upper body, plus they also engage your lower back and core! Besides the many physical benefits, there are plenty of reasons to want to add this iconic move to your wheelhouse– personal pride, ante for a wager (“I’ll bet you X push-ups I’m right”), also you never know when a drill sergeant might sneak up behind you and yell “Drop and gimme 50… or at least 1!” Whatever your reason, we’re here to help you check that off your fitness bucket list once and for all! Let’s do this.
What are the Skills Required for a Push-Up?
Strength is only the first half of the story when it comes to what is required to complete a push-up. Yes, you’ll need to make sure your muscles have enough gusto for the push-up, but another thing to consider is your stability. The more stable you are in your joints, the better you are able to control yourself throughout the range of motion of the push-up. Breaking it down, there are three components to consider– core strength, upper body stability, and upper body strength.
Core strength
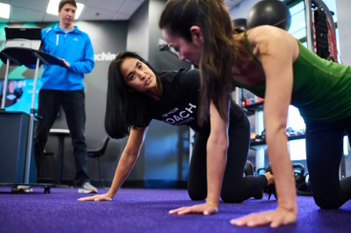
First things first! In order to successfully get ready in the starting position of the push-up, you’ll need to be able to hold your body up in a plank position. The plank hold requires core strength, enough muscular “oomph” in those abdominals to stabilize your spine and keep your back in a straight line. Throughout the range of motion of a push-up, your core must be strong enough to maintain that straight line position in your back as you lower your body down toward the ground, stop, change directions and press back up against gravity. An exercise you can do to build up your core strength is a modified low-plank hold, also known as a kneeling plank hold.
Upper body stability
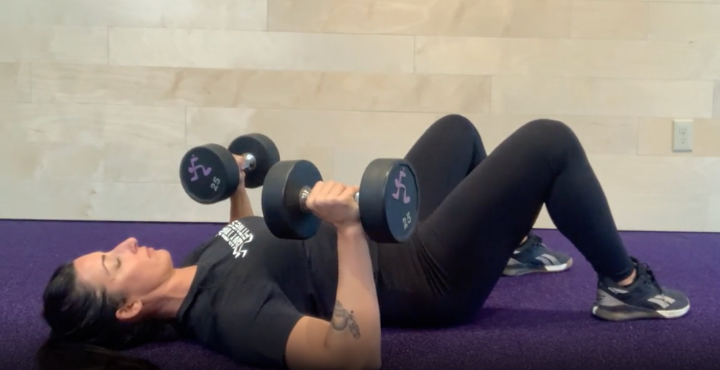
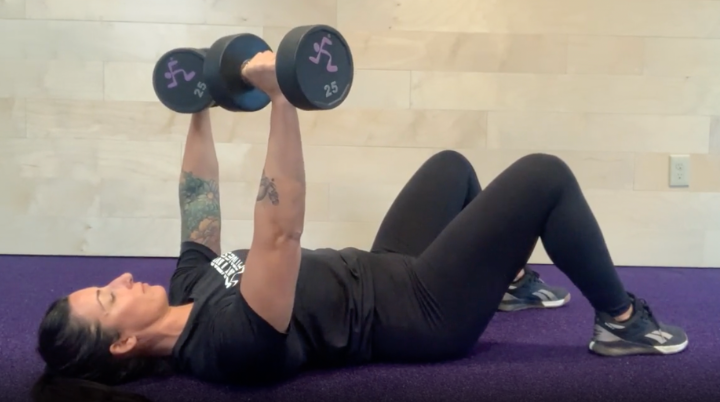
Another thing you’ll want to make sure you’re ready for is the demand the push-up can place on your upper body joints, in particular your shoulders and wrists. If you get into a plank position and feel any discomfort or pain in your joints, go ahead and opt for a Dumbbell Floor Press exercise to work on building your upper body stability without the need to lift your own bodyweight. Using free weights is also a fantastic way to build up stability in your shoulders, because the weights are not fixed (hence the name “free weights”) and you need to balance them as you press them away from the floor.
Upper body strength
Finally, let’s consider the strength required to do the push-up. The primary muscle groups used in the push-up are the pectoralis (chest), anterior deltoid (the front part of the shoulder) and the triceps (the back of the upper arm). These muscle groups all work together as a team (with assistance from your core and some back muscles, too) in order to move your body from the lowered-down plank back up to the high-plank position. One of the best exercises to build up the strength of these muscles is, well, the push-up! So, let’s get down to business…
Exercises That Will Help Get You to a Push-Up
We recommend doing these exercises in progression, even if it’s over time, to develop the skills to do a push-up. This journey might span one workout session or many, so keep this point in mind: How long it takes you to master this exercise doesn’t matter. Just remember to BREATHE during each of the exercises and move on to the next one once you’ve mastered the previous movement.
High Plank Hold
The high plank hold is the starting position of the push-up. Practicing this exercise will help you develop joint stability in your wrists and shoulders as well as core strength, both of which you’ll need for a push-up. Aim for holding a plank for 30 to 60 seconds at a time, making sure that your body stays in a straight line for the duration, and your shoulders remain over your wrists as well. If a workout buddy or coach is not available to check your form, do your planks side-by-side with a mirror so you can make sure those hips and shoulders stay aligned.

Incline Push-Up
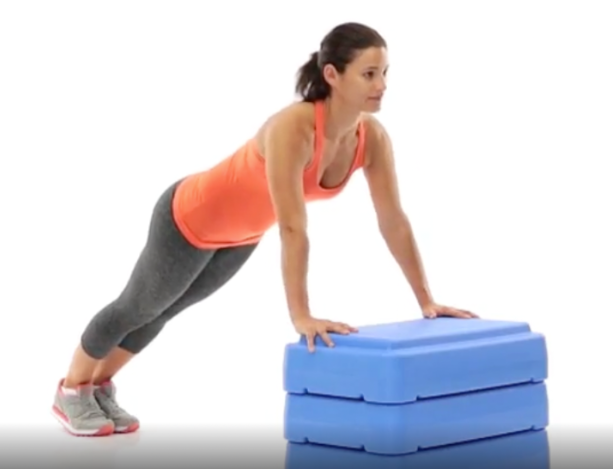
Once you’ve mastered the high plank hold, try and incorporate motion into your plank by doing an incline push-up. This can be done by placing your hands on a stable surface such as a bench or box, stepping back into a plank, bending your elbows to lower down into a push-up and then pressing back up to a high plank position (don’t forget to exhale every time you press!). Doing a push-up at an incline rather than on the ground makes it more accessible, because you are moving less of your own body weight due to the fact that you are at an angle. Once you feel confident completing the incline push-up variation, try a slightly more challenging option, the band-assisted push-up.
Band-Assisted Push-Up
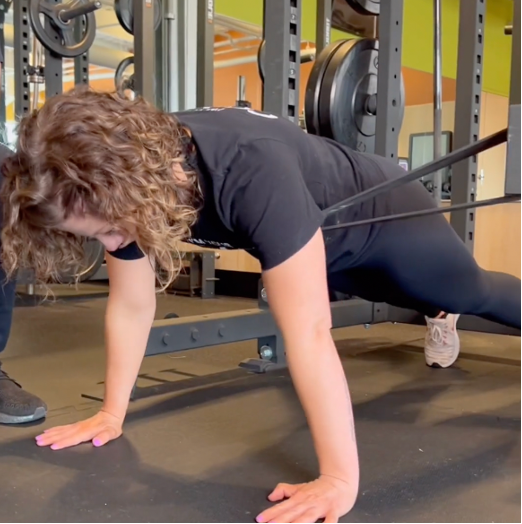
Resistance bands are a versatile tool in the gym, and their stretchy nature can be used to build up strength– here’s how to use resistance bands to help you get to a push-up. Attach a large loop superband around two fixed points, such as the spotter arms on a weightlifting rack. The band should be about knee-height. Position yourself over the band in a high plank so that it supports your chest. Bend your elbows and allow yourself to lower down, with the band assisting you, and press back up to a high plank. Once you feel comfortable doing push-ups with the resistance band, you’re ready for bodyweight push-ups from the kneeling position, also known as modified push-ups. Here we go!
Modified Push-Up
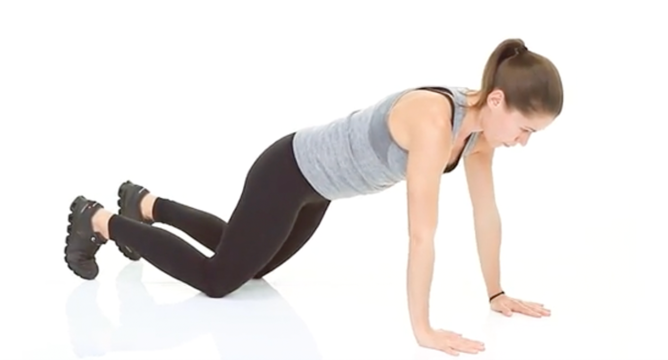
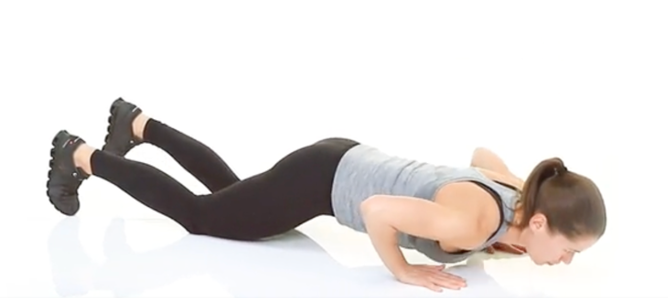
Okay you’re almost there! We are at the final exercise before mastering the push-up– the modified push-up! This exercise is a push-up completed from a kneeling position. This gives you the experience of moving your own body weight, however since you’re kneeing rather than in a full plank position, you have less actual weight to move. This makes it a great “feeler” exercise that allows you to test the waters and see if you’re ready to do the full move!
Perfect Push-Up Form
Feeling good about the four preparation exercises listed above? Well then, we say… “Ready? Set… Go!” Here is how to complete a perfect push-up:
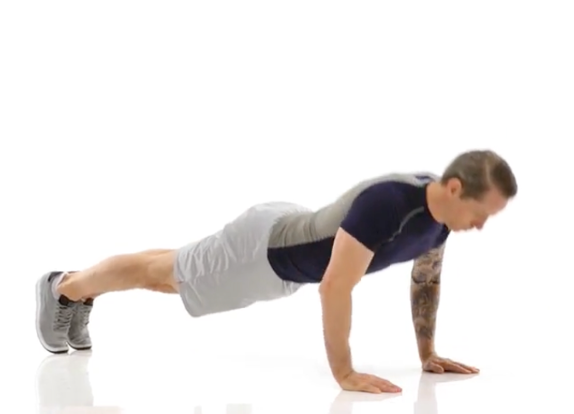
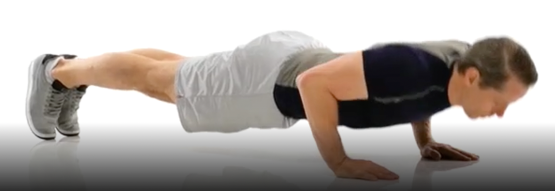
- Support your body on your toes and hands with your elbows bent and your chest nearly touching the floor.
- Push up to a straight arm position.
- Lower your body back to the start position and repeat.
- Keep your back flat and your hips in line with your shoulders throughout.
Well, there you have it, folks! Take your time and make the most out of each step toward building your strength. It will make finally nailing that first push-up all the more gratifying. Don’t give up – push-up!
